You wake up in the middle of the night to a strange, rushing sound. As you groggily make your way to investigate, you feel a puddle forming beneath your feet. To your horror, you discover water gushing from a bursting pipe in the wall. Your heart sinks as you realize the potential for disaster that lies ahead.
It can quickly turn into a homeowner’s nightmare, causing significant water damage, mold growth, and potentially costly repairs if not addressed immediately. As the water continues to pour out, you know that time is of the essence. Panic starts to set in as you try to remember what you’re supposed to do in this situation.
Don’t let this situation catch you off guard. By acting fast and taking the proper steps, you can minimize the potential for further damage and get the situation under control. Here’s what you should do if you find yourself dealing with a bursting pipe:
Step 1: Shut Off the Main Water Supply
As soon as you realize there is a pipe issue, you need to move quickly to shut off the main water supply. Frantically, you rush to locate the main water shutoff valve, following the main line as it enters your home. Your mind races, trying to remember where you last saw it.
Finally, you spot it, and with a few hard turns of the valve, you shut off the gushing flow of water. The rushing sound stops, but now you’re left with a significant pool of water that has already seeped into floors, walls, and furniture.
Step 2: Turn Off the Electricity (If Necessary)
Scanning the scene, you realize the bursting pipe is dangerously close to some electrical outlets. With the floor already flooded, you know there’s a serious risk of electric shock or fire if you don’t act quickly. You locate the circuit breaker and shut off the power to that area of the house, reducing the hazard.
Step 3: Open Faucets and Drain Lines
With the flow of water stopped, you now need to relieve the pressure in the pipes and allow any remaining water to drain out. You hurry to each sink, tub, and shower, opening up the faucets to create an escape route for the trapped water.
Step 4: Locate and Assess
Now that the immediate crisis has been averted, you take a deep breath and try to locate the source of the leak. You follow the trail of water back to where it was gushing from the wall, and upon closer inspection, you see a crack in the pipe that must have burst from the water pressure or freezing temperatures.
Step 5: Clean Up and Mitigate Water Damage
Once you’ve identified it, you now need to address the significant flood that has already occurred. You grab every towel and mop you can find and begin the arduous process of soaking up the water. As you do, you realize that your favorite rug and some boxes of stored belongings have also been drenched, requiring you to remove them from the area to prevent further damage and mold growth.
Step 6: Call a Plumber (If Necessary)
After hours of cleaning up the initial flood, you take a closer look at the burst pipe. It’s located behind the wall, making a DIY repair extremely difficult. You realize that this is a job for a professional plumber, someone who has the tools and expertise to properly access and repair the pipe without causing any additional damage. You make the call and schedule an emergency visit.
Step 7: Repair the Bursting Pipe
If you feel comfortable tackling the repair yourself, you’ll need to replace the damaged section of the pipe. This may involve cutting out the burst section and installing a new piece of pipe using appropriate fittings and connectors. Make sure to properly measure and cut the replacement pipe to ensure a secure fit.
Step 8: Turn Water Supply Back On and Check for Leaks
Once the repair is complete, it’s time to see if your efforts were successful. The plumber gives you the go-ahead to turn the main water supply back on. You make your way back to where you first shut off the water at the start of this ordeal.
With an apprehensive hand, you slowly turn the valve back to the open position. You hold your breath, straining to listen for any telltale sounds of water escaping. After a tense moment, the pipes fill back up, but no additional leaks occur. A sigh of relief comes over you as you realize the repair held.
However, the work isn’t over yet. You’ll need to closely inspect the entire area around the repaired pipe over the next few days and weeks to ensure no new leaks or moisture spots appear. Any residual water left unchecked could eventually lead to mold or other structural issues.
For now, you can turn your attention to the arduous process of drying out the area fully. You set up fans and dehumidifiers, running them around the clock. Slowly but surely, the lingering puddles and moisture dissipate.
As you remove any remaining wet items, you take inventory of the damage caused. Lengthy repair and renovation work lies ahead, but you’ve made it through the initial crisis. You make a mental note to keep a closer eye on your home’s plumbing and consider taking preventative measures…

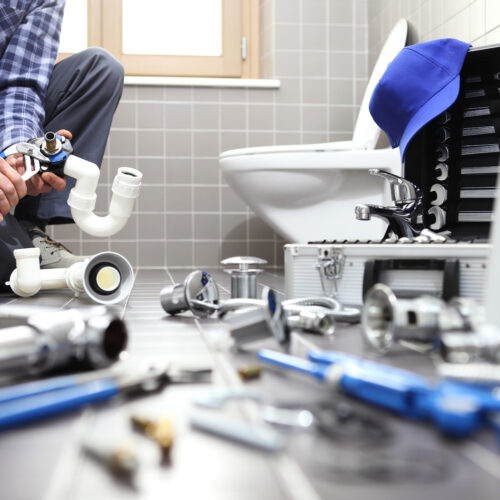
Tools Needed for Repairing a Bursting Pipe
- Pliers
- Pipe Wrench
- Hacksaw or Tubing Cutter
- Emery Cloth or Sandpaper
- Replacement Piping and Fittings (matching the existing pipe material and size)
- Bucket
- Towels or Rags
- Mop
- Fan or Dehumidifier (for drying)
- Flashlight (for hard-to-reach areas)
- Gloves and Safety Glasses
Preventing Future Bursting Pipes
While this can happen unexpectedly, there are steps you can take to help prevent them in the future:
- Insulate exposed pipes, especially in attics, crawl spaces, and exterior walls, to protect them from freezing temperatures.
- Keep your home’s interior temperature above 55°F during the winter months, even when you’re away, to prevent pipes from freezing.
- Consider installing a water leak detection system, which can alert you to leaks or potential bursting pipes before significant damage occurs.
- Know the location of your main water shutoff valve and make sure it’s accessible and in working order.
- Schedule regular plumbing inspections and replace aging or corroded pipes as needed.
Remember, this can cause significant damage if not addressed promptly, so it’s crucial to act fast and prioritize safety. If you’re uncomfortable with any part of the repair process or if the damage is extensive, it’s always best to call in a professional plumber to avoid further complications or potential hazards.


